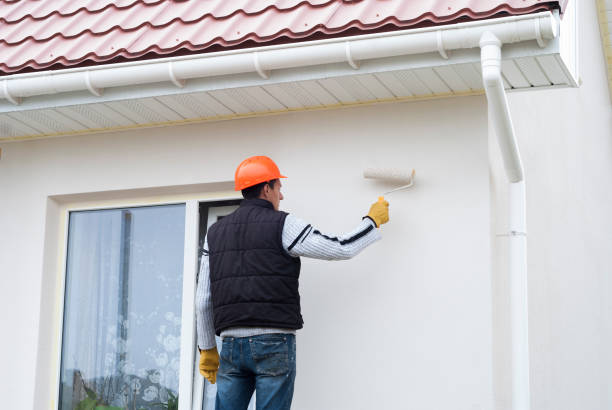
Proper surface preparation is a critical step in achieving a flawless and long-lasting paint job. Rushing through or skipping this process can lead to uneven finishes, poor paint adhesion, and reduced durability. Below is a comprehensive guide on how to properly prepare surfaces before starting your painting project.
Step 1: Inspect the Surface
Before diving into surface preparation, conduct a thorough inspection of the area you plan to paint.
– Cracks or holes: These need to be repaired before painting.
– Peeling or flaking paint: Remove any loose material for smooth results.
– Dirt, grease, or stains: Clean surfaces thoroughly to ensure proper adhesion.
– Mold or mildew: Treat with appropriate cleaning solutions to prevent future growth.
Step 2: Clean the Surface
Cleaning is crucial as dirt and grime can prevent paint from adhering properly.
| Surface Type | Cleaning Method |
| Walls (painted) | Wipe with a damp cloth or mild detergent solution |
| Glossy surfaces | Use a degreaser if necessary |
| Outdoor areas | Pressure washing for large external surfaces |
Ensure all surfaces are completely dry before proceeding.
Step 3: Repair Imperfections
After cleaning, repair cracks, dents, or other imperfections using appropriate fillers like spackle or putty.Small cracks/dents:Use spackling paste; let it dry and sand smooth.Large holes:Apply patching material or mesh tape for reinforcement.Wood imperfections:Use wood filler specifically designed for wooden surfaces.
Once repaired, sand the area lightly with fine-grit sandpaper (120–150 grit) to create an even surface.
Step 4: Sand the Surface (If Needed)
Sanding helps in removing old gloss and roughening up the surface, allowing new paint to adhere effectively. Key tips: – For glossy finishes like semi-gloss or satin paints, lightly sand until the sheen disappears. – Avoid over-sanding as it may damage delicate surfaces. – Always use a dust mask while sanding to protect yourself from particles.
Step 5: Tape Off Areas and Protect Surroundings
To ensure clean lines and avoid accidental smudges: – Apply painter’s tape along baseboards, trim edges, and windows. – Cover furniture with drop cloths or plastic sheeting. – Protect floors using heavy-duty canvas drop cloths instead of thin plastic sheets that can tear easily.
Step 6: Prime Where Necessary
Priming is an essential step depending on your surface condition: – When priming is necessary:– Painting over dark colors with lighter shades – Applying paint on porous surfaces like drywall – Covering stains such as watermarks – Switching from oil-based paints to latex paints – Choose primers designed specifically for your project (e. g. , stain-blocking primer).
Benefits of Proper Preparation Before Painting
Investing time in preparation ensures: 1. A smoother finish with fewer visible imperfections. 2. Improved paint adhesion resulting in durable results. 3. Reduced likelihood of peeling or chipping over time. 4. More efficient use of paint due to enhanced surface uniformity.
By systematically addressing these steps before picking up your brush or roller, you’ll create optimal conditions for success in your interior painting endeavor while saving time and resources in the long run.
Why Hiring Painters Perrysburg OH for Eco-Friendly Painting Matters for Your Home and the Environment
The choice of paint you use in your home has a significant impact not only on the aesthetics and functionality of your space but also on the environment and your well-being. Eco-friendly paints are becoming an increasingly popular option due to their numerous benefits. Here, we explore why opting for eco-friendly paint is a wise decision for both your home and the planet.
Benefits of Eco-Friendly Paint
Eco-friendly paint offers advantages that extend beyond its application.
- Reduced Volatile Organic Compounds (VOCs):Eco-friendly paints either eliminate or drastically reduce VOC emissions, improving indoor air quality.
- Improved Indoor Air Quality:With fewer toxic chemicals being released, eco-friendly paints contribute to a healthier environment inside your home, lowering the risk of respiratory issues or headaches often associated with conventional paint fumes.
- Environmental Sustainability:Many eco-friendly paint options are made from natural ingredients such as clay, plant-based oils, or water-based solutions. These materials break down more easily in nature without causing long-lasting harm to ecosystems.
- Odor-Free Application:Traditional paints can emit strong odors that linger for days or even weeks after painting. Low-VOC or zero-VOC paints are virtually odorless, making them more pleasant to work with indoors.
- Energy Efficiency Improvements:Some eco-paints come with heat-reflective properties that help regulate indoor temperatures, potentially reducing energy usage for heating and cooling over time.
Key Features to Look For in Eco-Friendly Paint
Not all products marketed as “eco-friendly” meet stringent environmental standards.
| Feature | Why It Matters | Example Characteristics |
| Low/Zero VOC Content | Minimizes harmful fumes during application | Check certifications like Green Seal |
| Renewable Ingredients | Promotes sustainability | Soybean oil, natural pigments |
| Water-Based Composition | Reduces toxic chemical content | Easier cleanup and disposal |
Practical Tips When Using Eco-Friendly Paint
Maximizing the benefits of eco-paint goes beyond simply choosing the right product:
1.Prepare Surfaces Properly:Ensure surfaces are clean and smooth before painting to achieve optimal results with fewer coats. 2.Ventilation Still Matters:Even though eco-paints emit minimal toxins, it’s wise to keep windows open during application for better airflow. 3.Choose Durable Formulas:Some brands offer durable options designed to withstand wear-and-tear—ideal for high-traffic areas like hallways or kitchens. 4.Recycle Leftovers Responsibly:Dispose of any unused paint according to local recycling guidelines to minimize environmental impact.

Popular Brands Offering Eco-Friendly Paint Options
| Brand | Notable Features | Availability |
| Benjamin Moore Natura | Zero VOCs; excellent durability | Widely available in North America |
| ECOS Paints | Non-toxic; customizable colors | Available online |
| Sherwin-Williams Harmony | Antimicrobial properties; low odor | Nationwide retailers |
Switching to eco-friendly paint is one simple yet effective way to create a healthier living space while prioritizing sustainability at home. Choosing these products not only benefits you but also contributes positively toward environmental conservation efforts globally.
Choosing an Eco-Friendly Painting Company Perrysburg OH for Your Home and the Environment
Choosing eco-friendly paint is more than a trend — it’s a meaningful decision for your health, your home, and the planet. With growing awareness of the environmental and health impacts of traditional paints, eco-friendly alternatives have emerged as a superior choice for sustainable living. Here’s why making the switch matters.
Benefits of Eco-Friendly Paint
- Healthier indoor environments are particularly important for children, elderly individuals, and those with allergies or asthma.
- Many traditional paints contribute to ground-level ozone formation and air pollution during their production and use.
- Eco-friendly paints use natural ingredients such as clay, lime, or plant-based materials that are biodegradable and less harmful to ecosystems.
- Their reduced environmental footprint makes them a responsible choice for environmentally-conscious homeowners.
- Low-VOC and zero-VOC products emit minimal odor during application, improving comfort while painting.
- This is especially advantageous in homes where occupants need to remain in the space during renovations.
- Advances in paint technology mean eco-friendly options often last as long as conventional paints while maintaining vibrant finishes over time.
Common Ingredients in Eco-Friendly Paints
| Ingredient | Purpose | Environmental Benefit |
| Water | Solvent | Replaces petroleum-based solvents; reduces VOC content |
| Natural pigments | Coloring | Derived from minerals or plants; less toxic than synthetic dyes |
| Plant oils (e.g., linseed) | Binding agent | Renewable resource; biodegradable |
How to Identify Eco-Friendly Paints
- Green Seal: Ensures low-VOC content and environmentally safe practices during manufacturing.
- LEED Certification Compliance: Recognized standards for sustainable building materials.
- GREENGUARD Certification: Verifies minimal chemical emissions into indoor air.
- Terms such as “low-VOC” or “zero-VOC” on product labels also point toward safer choices.
Practical Tips When Using Eco-Friendly Paint
- Ventilate your space by opening windows during painting projects to further enhance air quality.
- Conduct proper surface preparation (cleaning walls thoroughly) to ensure optimal adhesion without needing excess coats.
- Choose light-reflective colors whenever possible; they reduce energy consumption by enhancing natural lighting indoors.
Incorporating eco-friendly paint into your next project not only benefits your home but also contributes positively to global sustainability efforts by reducing emissions and waste associated with traditional materials—choices that matter today more than ever before.
Tips for Choosing the Best Interior & Exterior Painting Perrysburg OH Services for Your Home
Selecting the right type of paint for your interior walls is a critical step in ensuring your painting project meets both functional and aesthetic goals. With a wide range of options available, it’s important to understand how different types of paint can impact the final result in terms of durability, finish, and overall feel.
Types of Interior Paints and Their Applications
- Best For:Ceilings, low-traffic areas like bedrooms or dining rooms.
- Features:Offers a smooth, non-reflective finish that hides imperfections well. However, it is less durable and prone to stains compared to other finishes.
- Best For:Living rooms or hallways with moderate traffic.
- Features:Slightly more durable than matte finishes, eggshell paint has a soft sheen that adds subtle elegance while being easier to clean.
- Best For:Kitchens, bathrooms, children’s rooms, or other high-moisture areas.
- Features:Satin paints strike a balance between aesthetics and practicality by offering a smooth finish that is moderately resistant to dirt and moisture.
- Best For:Trim work, cabinets, doors, or areas prone to frequent cleaning like laundry rooms.
- Features:Semi-gloss provides a noticeable shine along with excellent durability and washability.
- Best For:Small accents such as furniture or decorative pieces rather than large wall surfaces due to its reflective nature.
- Features:Creates an enamel-like sheen but requires thorough surface preparation as it highlights imperfections.
| Type | Sheen Level | Durability | Best Uses |
| Flat/Matte | No sheen | Low | Ceilings, low-traffic spaces |
| Eggshell | Low sheen | Moderate | Living rooms, hallways |
| Satin | Soft luster | Good | Kitchens, bathrooms |
| Semi-Gloss | Medium shine | High | Trim work, high-traffic areas |
| Glossy | High shine | Very high | Furniture accents |
Factors Influencing Your Choice
- Room Functionality: Spaces experiencing more wear (e. g. , kitchens) benefit from durable options like satin or semi-gloss.
- Wall Condition: Flat paints hide flaws better than glossy finishes.
- Cleaning Requirements: Opt for semi-gloss or satin finishes in areas where easy cleaning is necessary.
- Lighting Conditions: Glossier paints reflect more light and can make small spaces appear larger but may cause glare in overly bright spaces.
Tips for Selecting the Right Paint
- Always test samples on your walls under varying lighting conditions before purchasing large quantities.
- Look for paints labeled as “washable” if you anticipate regular cleaning needs.
- Check for low-VOC (volatile organic compound) labels when prioritizing air quality in family spaces.
- Match paint finishes based on adjacent surfaces – e. g. , use semi-gloss for trims alongside satin on walls for contrast without inconsistency.
Taking the time to understand these considerations will ensure not only aesthetic harmony within your home but also long-term satisfaction with your painted surfaces over time.
A Guide to Choosing High-Quality Painting Supplies for Professional Results
When it comes to achieving professional results in any interior painting project, the quality of your supplies plays a critical role. Investing in high-quality painting materials can make all the difference between a flawless finish and a frustrating, subpar job. Below is a comprehensive guide to help you select the best tools and products for your next painting endeavor.
Essential High-Quality Painting Supplies
- Opt for paints from reputable brands with proven durability and coverage.
- Look for “low-VOC” or “zero-VOC” options for better indoor air quality.
- Choose paints designed specifically for your surface type (e. g. , walls, ceilings, or trim).
- Invest in brushes with synthetic bristles for water-based paints or natural bristles for oil-based paints.
- Select an angled sash brush for precision work around edges and corners.
- For larger surface areas, use flat brushes to ensure even application.
- Choose rollers with varying nap lengths depending on your surface texture:
- ¼-inch nap: Smooth surfaces like drywall.
- ¾-inch nap: Semi-rough surfaces like lightly textured walls.
- 1-inch or more: Rough surfaces such as brick or concrete.
- High-density foam rollers are ideal for smooth finishes on cabinets or furniture.
- Use high-quality painter’s tape to protect moldings, baseboards, and edges from accidental paint smudges.
- Select tape designed specifically to prevent bleeding while ensuring easy removal without residue.
- Canvas drop cloths provide superior protection compared to plastic sheets as they are reusable, durable, and slip-resistant.
- For light-duty projects, disposable plastic sheeting can act as an economical alternative.
- A heavy-duty metal or plastic tray ensures stability during rolling applications.
- Use disposable tray liners to simplify cleanup.
Additional Tools Worth Investing In
- Extension Poles:Useful when painting high ceilings or hard-to-reach areas without requiring ladders.
- Paint Edgers:Help achieve crisp, clean lines near ceilings or window frames without tape.
- Sandpaper/Sponges:Essential for prepping uneven surfaces before applying primer or paint.
- Stir Sticks:Ensure uniform consistency of paint prior to application.
| Item | Purpose | Recommended Material/Type |
| Paint Brushes | Precision work & edge detailing | Synthetic bristles (latex) |
| Rollers | Large surface coverage | Foam roller (smooth finishes) |
| Painter’s Tape | Protect edges & create clean lines | Bleed-resistant |
| Drop Cloth | Floor & furniture protection | Canvas |
| Paint Tray | Holds paint during application | Heavy-duty w/ disposable liners |
Benefits of Using Quality Supplies
- Improved durability resulting in fewer repaints over time.
- Enhanced coverage helps reduce the number of coats required.
- Better control over application leads to smoother finishes with minimal streaks or marks.
- High-quality tools often last longer than cheap alternatives when properly maintained.
Tips When Purchasing Painting Supplies
- Synthetic brushes pair well with latex paints because they resist water absorption better than natural bristles.
- Don’t compromise on drop cloths; lightweight plastic sheets may tear easily during work sessions.
- Test out samples of tape on small areas before extensive use—this ensures compatibility with different wall textures.
By prioritizing top-notch materials tailored specifically for your project’s needs, you’ll save time, reduce effort spent on corrections later, and enjoy superior results that speak volumes about the craftsmanship behind your work.
Understanding the Role of Paint Primers and When to Use Them
Paint primers are an often-overlooked, yet highly essential part of any painting project. They serve as the foundation for a durable and visually appealing paint finish. Without proper priming, even the highest quality paints can fail to adhere correctly or provide desirable results. Below, we’ll delve into what primers are, why they are important, and when you should use them.
What is Paint Primer?
A paint primer is a preparatory coating applied to surfaces before painting. Its primary purpose is to ensure better adhesion of paint, enhance durability, and provide a uniform base for topcoats. Think of it as the middle ground between the surface you’re painting and the final layers of paint.
Benefits of Using Paint Primers
Using a primer can significantly improve your painting project’s outcome by addressing common issues that arise during application or over time.
- Improved Adhesion: Primers create a bond between the paint and surface, helping the topcoat stick better.
- Surface Sealing: They seal porous materials like drywall or wood, preventing uneven absorption of paint.
- Stain Blocking: Primers cover stains (e. g. , from smoke, water damage, or grease) so they don’t bleed through new layers of paint.
- Color Uniformity: By creating a neutral base, primers allow true color representation and reduce the number of finishing coats needed.
- Increased Durability: A well-primed surface resists chipping, peeling, and fading over time.
Types of Paint Primers
| Primer Type | Best For | Characteristics |
| Latex-Based Primer | Drywall or previously painted surfaces | Water-based; low odor; fast drying |
| Oil-Based Primer | Woodwork & stained surfaces | Durable; blocks tough stains; longer drying time |
| Shellac-Based Primer | Severe stain blocking | Excellent for heavy stains or odors |
| Bonding Primer | Glossy/non-porous surfaces (e.g., tiles) | Ensures adhesion on difficult-to-paint materials |
When Should You Use Primer?
- Applied directly to raw drywall, wood, metal, or concrete helps seal pores for smoother application.
- Transitioning from darker shades to lighter hues often requires primer for even coverage without unnecessary layers.
- Painting glossy surfaces such as tiles requires bonding primers to ensure adherence.
- To mask blemishes like watermarks or smoke stains that may show through regular paint layers.
- In bathrooms and kitchens prone to humidity exposure, moisture-resistant primers protect against peeling or mildew growth.

Tips for Proper Application
- Always clean and dry surfaces thoroughly before applying primer.
- Use brushes designed specifically for oil-based primer if working with an oil-based product.
- Allow adequate drying time between primer coats (typically 1–4 hours depending on type).
- Sand lightly after priming if necessary to create an ultra-smooth base.
By understanding how primers work and selecting one suited to your project’s needs, you set yourself up for long-lasting professional-grade results in your interior painting endeavors. Proper preparation makes all the difference in achieving beautiful spaces you’ll enjoy for years ahead.
Everything You Should Know About Selecting the Right Paint Finish for Your Space
Choosing the right paint finish is a vital aspect of any painting project. The finish you select impacts not only the appearance of your walls but also their durability and ability to withstand wear and tear. Below, we provide a comprehensive guide to help you make an informed decision about paint finishes for your space.
Common Types of Paint Finishes
Paint finishes are typically categorized into five main types.
- Appearance: Non-reflective, smooth, and velvety.
- Best For: Low-traffic areas like bedrooms or ceilings where durability isn’t a top priority.
- Advantages: Excellent at hiding wall imperfections (e. g. , cracks or dents).
- Disadvantage: Difficult to clean; not suitable for spaces prone to stains or moisture.
- Appearance: Slightly more lustrous than flat finish with a soft sheen.
- Best For: Living rooms, dining areas, and hallways that see moderate traffic.
- Advantages: Easier to clean than flat finishes while still hiding minor flaws on surfaces.
- Appearance: Smooth with a subtle sheen that reflects more light than eggshell.
- Best For: High-traffic areas like kitchens, bathrooms, and kids’ rooms due to its durability.
- Advantages: Resistant to moisture and stains; easy to wipe clean without damage.
- Appearance: Noticeably reflective and shiny compared to satin or eggshell finishes.
- Best For: Trim work, baseboards, doors, cabinets; also effective in bathrooms and kitchens due to its water resistance.
- Advantages: Extremely durable and resistant to moisture, making it ideal for high-maintenance surfaces.
- Appearance: The shiniest of all finishes with a mirror-like quality.
- Best For: Furniture pieces or decorative elements such as moldings; less common on walls.
- Advantages: Highly durable; easy to clean but highlights surface imperfections.
Factors To Consider When Choosing a Paint Finish
- Functionality & Traffic Levels | Area | Suggested Finish | |—————–|———————| | Bedroom | Flat or Eggshell | | Kitchen | Satin or Semi-Gloss | | Bathroom | Satin | | Hallways | Eggshell or Satin |
- Surface ImperfectionsIf your walls have minor imperfections (e. g. , dents), opt for matte or eggshell finishes as they minimize visibility.
- Desired AppearanceGlossy paints tend to brighten spaces by reflecting light but may look unappealing in large wall surfaces unless strategically used.
- Maintenance Requirements Higher gloss levels deliver better stain resistance & easier cleaning capacity
Everything You Should Know About Selecting the Right Paint Finish for Your Space
Selecting the right paint finish is a crucial step in your painting project. The finish you choose affects not only the overall aesthetic of your space but also the durability and maintenance of the painted surface. Understanding the different types of paint finishes and their ideal applications can help you make an informed decision.
Types of Paint Finishes
| Finish Type | Characteristics | Best Uses |
| Flat/Matte | Non-reflective, smooth appearance, hides imperfections | Ceilings, low-traffic areas like bedrooms |
| Eggshell | Slightly reflective, soft sheen, better durability than flat | Living rooms, dining rooms |
| Satin | Subtle shine, durable and easy to clean | Kitchens, bathrooms, high-traffic areas |
| Semi-gloss | Noticeable shine, highly durable and moisture-resistant | Trim, molding, doors |
| High-gloss | Very shiny finish with a polished look | Cabinets, furniture |
Factors to Consider When Choosing a Paint Finish
1.Room Functionality
- High-traffic areas (e. g. , hallways or kitchens) benefit from durable finishes like satin or semi-gloss.
- Low-traffic spaces such as bedrooms or formal living rooms work well with matte or eggshell finishes.
2.Lighting Conditions
- Rooms with limited natural light can benefit from glossier finishes to reflect light and brighten the space.
- For spaces with excess natural light, flatter finishes like eggshell or matte reduce unwanted glare.
3.Surface Imperfections
- Flat/matte paints are excellent for concealing surface flaws like dents or uneven textures since they absorb light rather than reflect it.
4.Ease of Cleaning
- Glossy finishes (semi-gloss and high-gloss) are easier to clean due to their smooth texture but tend to highlight imperfections in walls or surfaces.
Tips for Selecting the Perfect Finish
To ensure a polished final result:
– Test small samples of different finishes on your walls under various lighting conditions before committing. This allows you to evaluate how they appear at different times of day. – Use satin or semi-gloss paint in rooms where durability is critical due to exposure to grease or moisture (e. g. , bathrooms).
– Combine multiple finishes in one room for contrast—matte walls paired with semi-gloss trim create visual interest.
Visualizing Different Paint Finishes
The choice between paint finishes significantly impacts how color appears on surfaces:
– Matte/flat paints create a soft and muted look that feels cozy and understated. – Glossy paints enhance vibrancy but can make bold colors feel intense.
Selecting the right finish involves balancing aesthetics and practicality while considering your room’s specific needs and design elements.
- Steps a Painting Company Perrysburg OH Recommends for a Flawless Wall Finish
- 5 Signs You Need Painters Perrysburg OH for a Fresh Coat of Paint
- Proper Surface Preparation Tips for House Painting Perrysburg OH Projects
- Interior and Exterior Paint: A Guide from a Trusted Painting Company Perrysburg OH
- How Often Should You Opt for House Painting Perrysburg OH to Maintain Long-Lasting Beauty
- How to Choose the Right Paint for Interior and Exterior House Painting Perrysburg OH
- Step-by-Step Guide to House Painting Perrysburg OH: Tips for Professional Results