House Painting

Steps a Painting Company Perrysburg OH Recommends for a Flawless Wall Finish

painting services perrysburg

When it comes to painting walls, preparation is key to achieving a smooth and long-lasting finish. A well-prepared surface not only ensures the paint adheres properly but also enhances the overall appearance of the final result. Follow these essential steps before painting your walls to create a flawless finish.

1. Gather Necessary Tools and Materials

  • Tools: Paint rollers, brushes, painter’s tape, drop cloths, paint tray, ladder
  • Cleaning Supplies: Mild detergent, sponge or cloth
  • Repair Materials: Filler or spackle, putty knife, sandpaper
  • Optional Items: Primer (if required), stir sticks

2. Clear and Protect the Space

  • Move furniture out of the room or push it toward the center and cover it with drop cloths or plastic sheets.
  • Lay down drop cloths on the floor to catch any drips or spills.
  • Use painter’s tape to protect trim, baseboards, windowsills, and other areas you don’t want painted.

3. Inspect and Repair the Walls

  • Look for holes, cracks, or dents in the wall surface. Fill these imperfections using filler or spackle and smooth it with a putty knife.
  • Allow repairs to dry completely before proceeding.
  • Sand repaired areas lightly with fine-grit sandpaper until they are even with the surrounding wall.

4. Clean Thoroughly

  • Wipe down surfaces with a damp sponge or cloth using mild detergent if necessary.
  • Focus on areas prone to grime buildup like kitchen walls or spaces near light switches.
  • Let the walls dry fully before moving forward.

5. Check for Need of Primer

Wall Condition Primer Needed?
Previously painted in similar color No
Painting over dark colors Yes
Painting bare drywall Yes
Stained/damaged areas Yes

If necessary, choose a primer that suits your project—latex primers are great for most interior jobs.

6. Test Your Paint Colors

  1. Purchase small paint samples in your desired colors.
  2. Apply swatches directly on your wall in natural lighting conditions.
  3. Evaluate how light affects each shade throughout different times of day.

7. Stir Your Paint Properly

  • Stir paint thoroughly using consistent strokes .

Expert Tips for House Painting Perrysburg OH: Achieve Professional Results

Painting a room like a professional Perrysburg Painting company requires proper preparation, technique, and attention to detail. By following these steps, you can achieve smooth, long-lasting results that elevate the appearance of your space.

Gather the Right Tools and Materials for Interior & Exterior Painting Perrysburg OH

Tools Required:
– Paintbrushes (angled and flat)
– Rollers with appropriate nap size (based on wall texture)
– Painter’s tape
– Drop cloths or plastic sheeting
– Paint tray or bucket with a roller grid

Materials Needed:
– Primer (if required)
– Chosen paint (ensure sufficient quantity for two coats)
– Sandpaper or sanding block (medium and fine grit)
– Spackling paste or filler for wall imperfections

1. Prepare the Room for Painting

Cover Surfaces:
Use drop cloths to protect floors, furniture, and fixed fixtures like windowsills. Secure them with painter’s tape if needed.

Remove Obstacles:
Take down wall décor such as paintings, mirrors, or shelves. Remove switch plate covers and outlet covers to prevent paint splatter.

Clean Walls:
Wipe down walls with a damp cloth to remove dust, grease, or dirt buildup that could affect paint adhesion. For kitchen walls, use mild detergent to tackle oily residue.

2. Repair Imperfections on Walls

  1. Inspect walls for cracks, holes, or uneven surfaces.
  2. Fill gaps using spackling paste or filler.
  3. Once dry, sand filled areas until they are level with the wall surface.
  4. Wipe away dust from sanding before proceeding.
Surface Defect Solution Tools Needed
Nail holes Spackle + Sanding Putty knife + Fine-grit sandpaper
Cracked plaster Patch compound Trowel + Sandpaper
Uneven texture Joint compound Flat blade + Sander

3. Apply Painter’s Tape Strategically

  1. Press down firmly along the edges of the tape to prevent paint bleed.
  2. Avoid leaving tape on for too long post-painting as it might peel off dried paint.

4. Prime if Necessary

  • Use primer when transitioning from dark shades to light colors.
  • Priming is also essential when painting over glossy finishes.

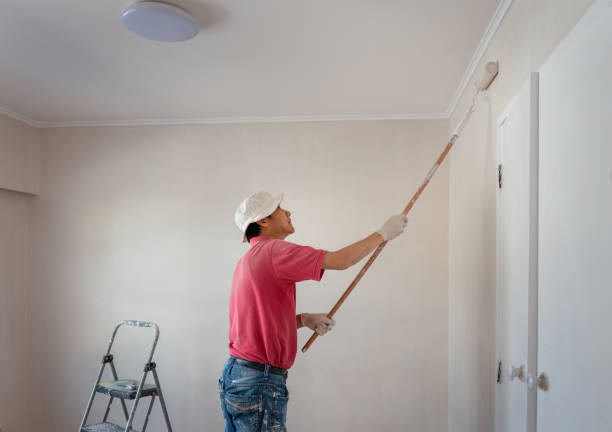
5. Start Painting Like a Pro

  1. Ceilings First: Use your roller in long strokes overlapping slightly each time.
  2. Walls Next: Utilize an angled brush around corners and edges before filling larger areas with rollers.
  3. Trim Last: Finish by painting baseboards and window frames using smaller brushes.

Pro Tips:

  • Work in small sections at a time.
  • Avoid overloading brushes or rollers as it leads to drips.
  • Allow adequate drying time between coats based on manufacturer recommendations.

By adhering closely to these steps and paying attention to detail throughout the process, you’ll achieve professional-grade results that transform your space without compromise.

How to Choose the Perfect Colour for Your Walls

Choosing the perfect colour for your walls is an essential step when redesigning your space. The right colour can enhance the mood, create harmony, and reflect your personal style. Below are key strategies and considerations to help you make the best decision.

Consider the Purpose of the Room

Each room in your home serves a distinct function, and its colour should align with that function.
Living rooms and family areas: Warm tones like beige, cream, or earthy shades foster comfort and sociability.
Bedrooms: Cool colours such as soft blues or greens create a calming atmosphere that promotes relaxation.
Kitchens: Bright colours like yellow or neutral tones can stimulate appetite and bring energy to the space.
Home offices: Shades of grey, off-white, or muted blues enhance focus and productivity.

Assess Natural Light in the Space

The type of natural light a room receives significantly affects how a colour appears throughout the day.
North-facing rooms: Tend to have cooler light; opt for warm undertones to balance this effect.
South-facing rooms: Benefit from ample sunlight, making cooler shades work effectively without appearing dull.
East-facing rooms: Soft blues or greens complement morning light beautifully but may need warmer accents for evening use.
West-facing rooms: Consider choosing colours that glow under warm sunset light, such as golden yellows or corals.

Use Colour Psychology to Your Advantage

Different colours evoke specific emotions and associations. Leverage this understanding when selecting hues for your walls: | Colour | Emotions & Associations | Suitable For | |—————|—————————————————————|————————| | Blue | Calmness, serenity, stability | Bedrooms, bathrooms | | Yellow | Energy, happiness, optimism | Kitchens, dining areas | | Green | Balance, nature-inspired calm | Living rooms | | Grey | Sophistication, neutrality | Offices | | Red | Passionate energy (use sparingly) | Accent walls |

Test Paint Samples on Your Walls

Before committing to a paint colour: 1. Purchase test-sized paint samples in various shades you’re considering. 2. Apply each sample to small sections of your wall. 3. Observe how they look under different lighting conditions (natural daylight vs artificial lighting).

This process helps you avoid unexpected results once an entire wall is painted.

Identify Complementary Colours for Cohesion

Ensuring harmony between your wall colour and surrounding elements (furniture, flooring) is critical: – Use a colour wheel to find complementary colours. – Stick with either analogous schemes (colours adjacent on the wheel) or contrasting hues sparingly.

Don’t Forget Undertones

Many paint colours have subtle undertones—for example: – A grey with blue undertones may appear cooler. – Beige with yellow undertones will feel warm.

Always evaluate these nuances before deciding on a shade.

By carefully considering these factors—room purpose, lighting conditions, emotional impact of colours—you can confidently select a wall colour that enhances both functionality and aesthetics within your space.

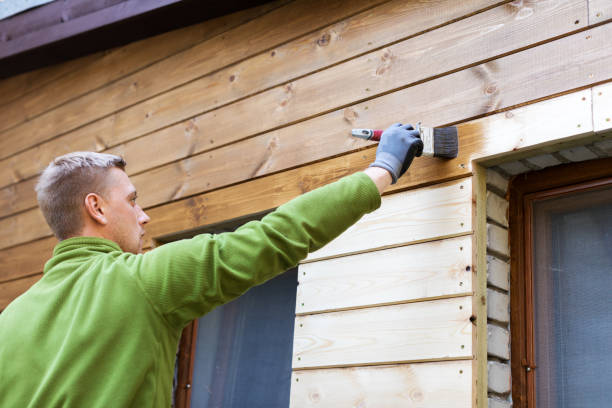
Expert Painters Perrysburg OH: Mastering Interior and Exterior Walls

Painting interior and exterior walls requires a strategic approach, proper tools, and attention to detail. Whether you’re refreshing a single room or giving the entire exterior of your home a facelift, mastering this art ensures durability and professional-grade results. Here’s how you can achieve impeccable outcomes for both interior and exterior walls.

Preparing the Surface

  • Clean the Walls:
    Dirt, grease, or mildew can prevent paint from adhering properly. Use:
  • A damp cloth for light cleaning on interior surfaces.
  • A pressure washer for exterior walls to remove debris and grime effectively.
  • Repair Damage:
    Fill cracks, holes, or uneven surfaces with caulk or spackle as needed. Sand down rough patches for a smooth finish.
  • Priming is Key:
    Use a primer before applying paint to achieve even coverage:
  • For water stains or dark colors on interiors, select stain-blocking primers.
  • On exteriors, opt for weather-resistant primers to protect against moisture damage.

Choosing the Right Paint

The type of paint you select plays a critical role in durability and appearance.

Area Recommended Paint Type Features
Interior Walls Matte or Satin Finish Smooth texture; hides imperfections
Kitchens/Bathrooms Semi-gloss or Gloss Finish Moisture-resistant; easy to clean
Exterior Walls Acrylic Latex Paint Long-lasting; withstands weather changes

For high-traffic areas like hallways or kids’ rooms, consider washable paints to maintain cleanliness over time.

Tools You’ll Need

  • Rollers (medium-nap is ideal for most walls)
  • Angled brushes for corners and trims
  • Drop cloths to cover furniture and floors
  • Large rollers with an extension pole
  • Sturdy ladders
  • Paint sprayers (optional) for quick coverage

Painting Interior Walls:

  1. Cut in along edges using an angled brush before rolling larger sections.
  2. Work in small sections while maintaining wet edges to prevent visible lines.
  3. Apply two coats of paint for consistent color depth.

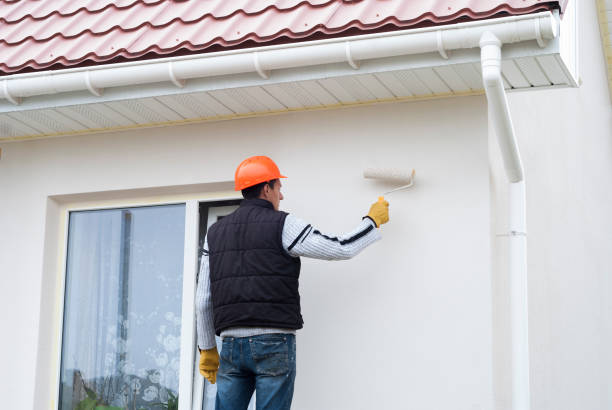
Painting Exterior Walls:

  1. Start from the top of the wall and work downward.
  2. Apply long strokes with consistent pressure when using rollers.
  3. For textured surfaces like stucco, use a thick-nap roller or spray application.

Finishing Touches

After applying two coats and letting them dry fully: – Remove painter’s tape carefully at an angle to avoid damaging adjacent areas. – Inspect your walls under various lighting conditions and touch up any missed spots.

Both interiors and exteriors benefit greatly from proper sealing where required (e.g., trim work). This step enhances resistance against wear over time. By following these methods meticulously, you can elevate any space with lasting beauty that reflects professional craftsmanship.

Transform Your Space with Royale Play Special Effects for Interiors

Adding a touch of creativity to your walls can completely transform the ambiance of your space. Royale Play special effects offer an innovative way to personalize your interiors with artistic finishes that go beyond standard paint. Utilizing these effects allows you to create stunning, textured walls that reflect your aesthetic preferences and enhance the overall vibe of a room.

Benefits of Using Royale Play Special Effects

  • Unique Visual Appeal: The special effects provide depth, texture, and artistic patterns that elevate the look of any room.
  • Customization: With various techniques and finishes available, you can achieve personalized designs tailored to your space.
  • Durability: Royale Play finishes are known for their high-quality materials and resistance to wear and tear.
  • Ease of Maintenance: These textures are easy to clean, making them perfect for both living areas and high-traffic spaces.

Popular Royale Play Special Effect Options

  1. Offers a smooth marble-like texture.
  2. Ideal for creating luxurious and sophisticated spaces.
  3. Works well in living rooms and formal dining areas.
  4. Provides a shimmering effect that reflects light beautifully.
  5. Perfect for accent walls or focal points in bedrooms or lounges.
  6. Creates intricate patterns resembling hand-crafted artistry.
  7. Suitable for adding charm to study rooms or home offices.
  8. Mimics the natural beauty of sand dunes with soft gradients.
  9. A great choice for creating relaxed, tranquil environments like bedrooms.
  10. Offers flowing wave-like textures for dynamic visual interest.
  11. Ideal for contemporary settings or creative spaces such as studios.

Application Tips for Royale Play Special Effects

  1. Prepare the Surface: Clean the wall thoroughly to remove dust or grease. Ensure it is smooth by sanding down uneven areas.
  2. Apply a Base Coat: Use a high-quality base coat in a color recommended by the manufacturer to enhance the special effect’s appearance.
  3. Use Professional Tools: Different effects require specific tools like sponges, spatulas, or rollers. Follow product instructions carefully.
  4. Experiment First: Always test the effect on a small section before applying it across an entire wall.
  5. Layer Strategically: Some effects may need multiple layers; allow adequate drying time between each coat to avoid smudges or imperfections.

Table: Comparison of Popular Effects

Effect Texture/Pattern Best Suited Room Type Key Highlight
Stucco Smooth marble-like Living Rooms & Dining Areas Luxurious finish
Metallic Lustre Shimmering & Reflective Bedrooms & Accent Walls Adds elegance
Spatula Technique Handcrafted artistry Home Offices & Libraries Unique patterns
Dune Soft sand-like gradients Bedrooms Relaxing vibe
Ripple Wave-inspired Studios & Creative Spaces Dynamic visual appeal

By choosing Royale Play special effects, you can achieve interiors that combine aesthetics with individuality, recreating ordinary spaces into extraordinary environments tailored to fit your personal style preferences perfectly while maintaining durability over time.


5 Signs You Need Painters Perrysburg OH for a Fresh Coat of Paint

A fresh coat of paint can revitalize your home, improve its aesthetic appeal, and protect its surfaces. However, knowing when it’s time to repaint isn’t always obvious. Here are five key signs to help you determine if your home could benefit from a new layer of paint.

1. Visible Cracks, Peeling, or Bubbling

Cracks, peeling paint, or bubbling are among the most noticeable indicators that your walls or exterior need attention. These issues often occur due to:
Exposure to Moisture: Humidity levels or water intrusion can weaken the bond between paint and the surface.
Poor Surface Preparation: Inadequate priming or prep before painting can cause premature cracking or peeling.
Aging Paint: Over time, even the most well-applied coatings will degrade.

If you notice these imperfections on your walls or trim, it’s likely time for a repaint to protect the underlying material.

2. Fading Colors

Faded paint diminishes the vibrancy and overall appearance of your home’s interior or exterior. For exteriors especially, fading is often caused by prolonged exposure to sunlight (UV radiation). On interiors, it may occur in rooms with significant natural light exposure. If you compare areas exposed to light with shaded spots and see a stark difference in color intensity, consider repainting those areas for uniformity.

Cause Effect Solution
UV Damage Colors lose their brightness Use UV-resistant paints
Interior Light Reflection Uneven tones on walls Opt for fade-resistant options

3. Stains That Resist Cleaning

Persistent stains—such as grease marks in kitchens or water stains from leaks—can detract from your home’s appearance if they cannot be removed with regular cleaning methods. Painting over these areas not only covers imperfections but also ensures future durability when paired with stain-resistant coatings.

4. Outdated Color Choices

Trends change over time; colors that were once modern might now feel dated. If your existing hues no longer align with your personal style or contemporary design preferences, repainting gives you an opportunity to refresh the look of your space while increasing appeal—especially important if you’re considering selling your property.

Popular Color Trends:
  • Neutral tones such as taupe and greige.
  • Earthy greens and blues for calming environments.
  • Bold accent colors like navy blue or deep emerald green.

5. Protective Wear is Diminished

Paint does more than just beautify; it acts as a protective barrier against damage like mold growth on interiors or harsh weather conditions on exteriors (e.g., rain, wind). Flaking paint exposes surfaces directly to these risks—which could result in costly repairs down the road if left unaddressed.

By keeping an eye out for these indicators in both interiors and exteriors of your property, you can preserve its structural integrity while maintaining its visual appeal through regular repainting cycles tailored to wear patterns evident in specific regions/climate zones​. Ensure any new project considers high-quality products designed specifically for longevity purposes based on location needs (e.g., waterproof coatings).

Tips from a Painting Company Perrysburg OH on Evaluating Your Paint Job and Knowing When to Repaint

Understanding when to repaint your home can save you time, effort, and money while ensuring your property maintains its aesthetics and structural integrity. Several factors come into play when assessing the severity of your current paint job. Below are key considerations and guidelines to help you determine whether it’s time for a fresh coat of paint.

Visible Signs of Aging Paint

  • Cracks: Fine or deep cracks in the paint layer may indicate aging or poor-quality application.
  • Peeling or Flaking: Areas where paint is peeling away from the surface suggest moisture damage or improper adhesion.
  • Fading Colors: Sunlight exposure can lead to dull, faded colors over time, reducing curb appeal.

If any of these conditions are present in multiple areas, it may be time for a repaint.

Environmental Factors Impacting Your Paint Job

Factor Impact on Paint Action Needed
Direct Sunlight Causes fading and blistering due to heat and UV exposure Opt for UV-resistant exterior paints
Humidity Levels Promotes moisture retention, leading to peeling or bubbling Use moisture-resistant paints
Harsh Winters Encourages cracking due to temperature fluctuations Choose durable, weather-grade paint formulas

Homes in regions with extreme weather conditions tend to require more frequent repainting.

Frequency Based on Paint Type and Surface

  • Interior Walls (e.g., living rooms): May last 5–7 years depending on traffic levels.
  • Bathrooms/Kitchens: Typically need touch-ups every 3–4 years because of higher humidity levels.
  • Exterior Walls: Require fresh coats every 5–10 years based on climate exposure and material (wood often needs earlier attention than brick).

Choosing high-quality paints with proper preparation will extend durability.

How Timing Impacts Repainting Costs

Delaying repainting could lead to additional expenses down the road. For example: – Ignoring cracks for long periods may result in water infiltration, requiring costly repairs. – Extensive deterioration will demand more labor-intensive preparation work before applying new layers.

Addressing minor issues early ensures that potential damage is contained while keeping costs manageable.

Checklist for Evaluating Repainting Needs

Use this quick checklist as a guide:

  1. Are there visible cracks or peeling anywhere?
    2. Has it been more than five years since the last application?
    3. Do stains persist after cleaning attempts?
    4. Is discoloration affecting your home’s appearance?
    5. Are environmental factors accelerating wear on surfaces?

If you check off multiple items above, it’s worth considering a professional consultation or starting your next painting project soon.

By regularly assessing these elements, you can maintain both the visual appeal and structural health of your home while avoiding unnecessary delays in upkeep tasks that might compound over time.

Painting with turquoise acrylic colour Woman painting an old retro china cabinet in turquoise House Painting stock pictures, royalty-free photos & images

Identifying Cracks, Peeling, and Discoloration with Interior & Exterior Painting Perrysburg OH

Properly maintaining the paint on your walls is essential for the aesthetics and structural protection of your home. Over time, even the highest-quality paints can show signs of wear and deterioration. One of the earliest indicators that your walls might need attention is the appearance of cracks, peeling, or discoloration. Understanding these issues will help you determine when a fresh coat of paint is necessary.

Causes of Cracks in Painted Surfaces

Cracks in painted walls are not only unsightly but can also hint at underlying structural issues or improper painting techniques. Some common causes include:
Moisture issues: Excess moisture behind walls can lead to cracking as water disrupts the adhesion of paint layers.
Improper surface preparation: Failing to clean or prime a surface before painting often causes paint to weaken over time.
Temperature fluctuations: Extreme temperature changes cause materials to expand and contract, leading to cracks in painted surfaces.

Peeling Paint: A Serious Warning Sign

Peeling paint is one of the most apparent signs that it’s time for a repaint. Unlike fading or minor scuffs, peeling indicates a failure in adhesion between one or more layers of paint and the wall surface beneath it. Common reasons for peeling include:
Exposure to excess humidity: Bathrooms and kitchens often suffer from peeling due to high levels of moisture if not properly ventilated.
Low-quality paint: Cheap paints are more likely to degrade faster when exposed to environmental wear-and-tear.
Skipping primer application: Primer acts as an anchor between the wall material and topcoat; skipping this step increases chances of premature peeling.

To address peeling effectively, it’s vital to remove all loose paint before applying a fresh coat. Sanding or scraping helps create a smooth surface that ensures better adhesion.

Understanding Wall Discoloration

Discoloration can manifest as faded colors, uneven patches, or even spots with entirely different tones from surrounding areas. This problem often arises due to:
Direct sunlight exposure: UV rays break down pigment molecules over time, causing fading on sections exposed to sunlight. – Water stains: Water leaks from pipes or roofs leave unsightly brownish marks that permanently alter wall color unless repainted. – Smoke damage: Residual smoke from candles, fireplaces, or cigarettes leaves yellowish tints over long periods.

Maintaining consistent temperature control and addressing leaks promptly can mitigate discoloration risks before they require major repainting efforts.

When Should You Act?

Issue Action Needed Timeframe
Minor cracks Fill with caulk; touch up with matching paint Within 3 months
Extensive peeling Remove loose paint; apply primer + repaint ASAP
Faded/discolored areas Repaint affected sections; consider UV-resistant options Within 6 months

Acting swiftly ensures minor issues don’t escalate into costly repairs involving drywall replacement or extensive cleaning tasks before painting.

By keeping an eye out for these signs—cracks forming along corners, flakes falling off walls, or discolored patches—you’ll know when it’s time to invest in professional-grade solutions for lasting results. Regular inspections paired with timely maintenance will extend the life span of your home’s interior finishes while maintaining its visual appeal year-round.

Understanding Why It’s Been Five to Seven Years Since Your Last Paint Job

Regularly updating the paint in your home is essential to maintain its aesthetic appeal and structural integrity. The five-to-seven-year period is often regarded as a general benchmark for interior and exterior repainting, but many factors can influence this timeline.

Why Paint Fades Over Time

  • Sunlight Exposure: Ultraviolet (UV) rays break down pigments in the paint, causing discoloration, fading, or chalking.
  • Moisture Levels: High humidity or water exposure can weaken paint adhesion, leading to cracking or peeling.
  • Everyday Wear and Tear: Heavy traffic areas such as hallways or children’s rooms accumulate marks and scuffs that become difficult to clean over time.
  • Cleaning Frequency: Frequent scrubbing with harsh cleaners can strip away the protective layer of the paint.

If these factors have significantly impacted your walls or exterior surfaces after several years, it may be time for a fresh coat of paint.

When Should You Repaint?

Area Recommended Repainting Interval
Living Rooms & Bedrooms 5–7 years
Kitchens & Bathrooms 3–5 years
Hallways & Corridors 2–4 years
Exterior Walls 5–10 years (depending on climate)

Keep in mind that these intervals may vary depending on your specific circumstances. For example, homes located in regions with extreme weather conditions might require more frequent exterior painting.

Benefits of Repainting After Five to Seven Years

  1. Paint acts as a barrier against moisture and prevents potential damage like mold growth or wood rot.
  2. Modern paints often contain low or zero VOCs (volatile organic compounds), which can improve indoor air quality compared to older coatings.
  3. A newly painted home creates a favorable impression on potential buyers if you’re planning to sell in the near future.
  4. Certain light-reflective paints can help regulate indoor temperatures, reducing energy costs over time.

How To Prepare for Your Next Painting Job

  • Inspect surfaces for cracks or peeling paint and repair them before starting.
  • Identify high-quality paints specifically designed for the area being repainted (e.g., moisture-resistant paints for bathrooms).
  • Choose colors that align with current design trends while ensuring they fit into the overall theme of your home.

By taking stock of how much time has passed since your last painting project and evaluating wear and tear throughout your living spaces, you can plan an effective repainting schedule tailored to your needs.

Signs You Need a Fresh Coat of Paint for Your Home

A fresh coat of paint not only enhances the aesthetic appeal of your home but also protects it from potential damage. Over time, signs start appearing that indicate it’s time to refresh your walls. Here are five key indicators that you may need to repaint your home.

Assessing the Severity of Your Current Paint Job and When to Repaint

One of the first steps in determining if a new coat of paint is necessary is evaluating the condition of your current paint job. Several factors contribute to how long paint lasts, including environmental conditions, the quality of paint used, and surface preparation during the prior application.

  • Exterior Paint: Typically lasts 5-10 years depending on climate and exposure to elements like sun, rain, or snow.
  • Interior Paint: Should generally be refreshed every 5-7 years unless subjected to excessive wear and tear.

If you notice widespread wear or fading, it could be time for professional repainting.

painter with paintbrush painting house wood facade painter with paintbrush painting house wood facade House Painting stock pictures, royalty-free photos & images

Identifying Cracks, Peeling, and Discoloration in Your Walls

  1. Cracks: Small fissures or cracks in painted surfaces can indicate underlying structural issues or improper application during previous painting jobs.
  2. Peeling: This happens when layers of old paint begin detaching from surfaces due to moisture buildup or age-related deterioration.
  3. Discoloration: Faded colors or uneven patches on walls signal UV degradation for exterior surfaces or water damage indoors.

Address these issues promptly before they lead to further complications requiring more invasive repairs.

Understanding Why It’s Been Five to Seven Years Since Your Last Paint Job

If five to seven years have passed since you last painted either your interior or exterior walls, it’s likely time for an update. Not only do older coats lose their protective qualities over time but failing to repaint within this timeframe can allow surfaces underneath (like wood or plaster) to deteriorate.

Here’s why regular upkeep matters:
| Time Since Last Paint | Common Effects | Recommended Action |
|———————-|—————-|——————–|
| Less than 3 years | Minimal fading | Touch-ups as needed|
| 5+ years | Visible wear | Full repaint | | 7+ years | Major damage risks | Repainting essential |

How to Handle Stains and Marks That Won’t Disappear with Cleaning

  • Grease stains: Common in kitchens, these often penetrate beyond surface layers of paint.
  • Watermarks: Indicate leaks which must be resolved before repainting.
  • Scuff marks: Found in high traffic areas like hallways; they can make interiors appear worn out over time.

When cleaning no longer restores your wall’s luster—it’s usually a sign that fresh painting is required.

Identifying Signs of Wear That Require Professional House Painting Perrysburg OH

Rust stains on metal components such as window frames or handrails are red flags indicating the breakdown of protective coatings applied earlier. Similarly:
– Wood siding may show significant rotting due lack-of-paint maintenance care , promoting problems longer left unaddressed”.

Recognizing Rust or Significant Wear That Calls for a Repainting Solution

Rust and significant wear on painted surfaces are critical indicators that your home may require a repaint. Over time, exposure to environmental factors such as moisture, UV rays, and temperature fluctuations can cause damage to the paint layer, leaving surfaces susceptible to corrosion and unsightly wear. Addressing these issues promptly can prevent further deterioration and maintain the aesthetic appeal of your home.

Signs of Rust That Demand Immediate Attention

  • Visible Rust Stains: Brown or reddish stains on painted surfaces often indicate oxidation of metal components beneath or around the paint.
  • Flaking Paint: Peeling or bubbling paint can expose bare metal that is more vulnerable to rust formation.
  • Structural Damage: Advanced rust can eat away at metal structures such as railings or window frames, affecting their integrity.

If you spot any of these signs, it’s essential to act quickly to prevent the spread of rust and avoid expensive repairs in the future.

How Significant Wear Impacts Your Paint Job

  • Fading Colors: UV rays from sunlight can cause vibrant colors to fade over time, dulling the overall appearance of your home.
  • Chalky Residue: A powdery surface on exterior walls indicates paint degradation caused by prolonged exposure to elements.
  • Hard-to-Clean Surfaces: When grime or dirt seems embedded in the surface despite cleaning efforts, it’s likely that the protective layer of paint has worn thin.
  • Cracking or Crazing: Tiny cracks or web-like patterns in the paint film signal aging and require immediate attention before they worsen.

Addressing these problems with a fresh coat ensures not only cosmetic enhancement but also added protection for your property.

Common Causes of Rust & Wear Solutions
Excessive moisture Use high-quality waterproof primers and paints designed for damp areas.
Poor surface preparation Clean surfaces thoroughly before repainting for better adhesion.
Low-quality paint products Opt for durable paints with weather-resistant properties.

Steps to Handle Rust Before Repainting

  1. Assess Damage Depth: Examine whether rust has only affected the surface level or penetrated deeper into materials like metal beams or pipes.
  2. Remove Rust Thoroughly: Use sandpaper, wire brushes, or chemical rust removers depending on severity.
  3. Apply Protective Coatings: Once cleaned, apply a rust-inhibiting primer before adding layers of fresh paint.
  4. Choose Quality Paints: For long-lasting results, invest in paints with anti-corrosion properties.

Taking these precautionary measures will help ensure durability while achieving a polished finish.

Preventative Tips: Avoid Future Issues

  • Regularly inspect exterior walls and metal structures for early signs of damage.
  • Ensure proper ventilation indoors to minimize humidity levels that contribute to moisture buildup.
  • Repaint with high-performance materials every five years (or sooner if needed) based on environmental conditions specific to your location.

By recognizing areas affected by rust or substantial wear early on and addressing them effectively through repainting solutions backed by proper preparation techniques, you can preserve both functionality and beauty in your living space efficiently over time.

Proper Surface Preparation Tips for House Painting Perrysburg OH Projects

Proper surface preparation is a critical step in achieving a flawless and long-lasting paint job. Rushing through or skipping this process can lead to uneven finishes, poor paint adhesion, and reduced durability. Below is a comprehensive guide on how to properly prepare surfaces before starting your painting project.

Step 1: Inspect the Surface

Before diving into surface preparation, conduct a thorough inspection of the area you plan to paint.
Cracks or holes: These need to be repaired before painting.
Peeling or flaking paint: Remove any loose material for smooth results.
Dirt, grease, or stains: Clean surfaces thoroughly to ensure proper adhesion.
Mold or mildew: Treat with appropriate cleaning solutions to prevent future growth.

Step 2: Clean the Surface

Cleaning is crucial as dirt and grime can prevent paint from adhering properly.

Surface Type Cleaning Method
Walls (painted) Wipe with a damp cloth or mild detergent solution
Glossy surfaces Use a degreaser if necessary
Outdoor areas Pressure washing for large external surfaces

Ensure all surfaces are completely dry before proceeding.

Step 3: Repair Imperfections

After cleaning, repair cracks, dents, or other imperfections using appropriate fillers like spackle or putty.Small cracks/dents:Use spackling paste; let it dry and sand smooth.Large holes:Apply patching material or mesh tape for reinforcement.Wood imperfections:Use wood filler specifically designed for wooden surfaces.

Once repaired, sand the area lightly with fine-grit sandpaper (120–150 grit) to create an even surface.

Step 4: Sand the Surface (If Needed)

Sanding helps in removing old gloss and roughening up the surface, allowing new paint to adhere effectively. Key tips: – For glossy finishes like semi-gloss or satin paints, lightly sand until the sheen disappears. – Avoid over-sanding as it may damage delicate surfaces. – Always use a dust mask while sanding to protect yourself from particles.

Step 5: Tape Off Areas and Protect Surroundings

To ensure clean lines and avoid accidental smudges: – Apply painter’s tape along baseboards, trim edges, and windows. – Cover furniture with drop cloths or plastic sheeting. – Protect floors using heavy-duty canvas drop cloths instead of thin plastic sheets that can tear easily.

Step 6: Prime Where Necessary

Priming is an essential step depending on your surface condition: – When priming is necessary:– Painting over dark colors with lighter shades – Applying paint on porous surfaces like drywall – Covering stains such as watermarks – Switching from oil-based paints to latex paints – Choose primers designed specifically for your project (e. g. , stain-blocking primer).

Benefits of Proper Preparation Before Painting

Investing time in preparation ensures: 1. A smoother finish with fewer visible imperfections. 2. Improved paint adhesion resulting in durable results. 3. Reduced likelihood of peeling or chipping over time. 4. More efficient use of paint due to enhanced surface uniformity.

By systematically addressing these steps before picking up your brush or roller, you’ll create optimal conditions for success in your interior painting endeavor while saving time and resources in the long run.

Why Hiring Painters Perrysburg OH for Eco-Friendly Painting Matters for Your Home and the Environment

The choice of paint you use in your home has a significant impact not only on the aesthetics and functionality of your space but also on the environment and your well-being. Eco-friendly paints are becoming an increasingly popular option due to their numerous benefits. Here, we explore why opting for eco-friendly paint is a wise decision for both your home and the planet.

Benefits of Eco-Friendly Paint

Eco-friendly paint offers advantages that extend beyond its application.

  • Reduced Volatile Organic Compounds (VOCs):Eco-friendly paints either eliminate or drastically reduce VOC emissions, improving indoor air quality.
  • Improved Indoor Air Quality:With fewer toxic chemicals being released, eco-friendly paints contribute to a healthier environment inside your home, lowering the risk of respiratory issues or headaches often associated with conventional paint fumes.
  • Environmental Sustainability:Many eco-friendly paint options are made from natural ingredients such as clay, plant-based oils, or water-based solutions. These materials break down more easily in nature without causing long-lasting harm to ecosystems.
  • Odor-Free Application:Traditional paints can emit strong odors that linger for days or even weeks after painting. Low-VOC or zero-VOC paints are virtually odorless, making them more pleasant to work with indoors.
  • Energy Efficiency Improvements:Some eco-paints come with heat-reflective properties that help regulate indoor temperatures, potentially reducing energy usage for heating and cooling over time.

Key Features to Look For in Eco-Friendly Paint

Not all products marketed as “eco-friendly” meet stringent environmental standards.

Feature Why It Matters Example Characteristics
Low/Zero VOC Content Minimizes harmful fumes during application Check certifications like Green Seal
Renewable Ingredients Promotes sustainability Soybean oil, natural pigments
Water-Based Composition Reduces toxic chemical content Easier cleanup and disposal

Practical Tips When Using Eco-Friendly Paint

Maximizing the benefits of eco-paint goes beyond simply choosing the right product:
1.Prepare Surfaces Properly:Ensure surfaces are clean and smooth before painting to achieve optimal results with fewer coats. 2.Ventilation Still Matters:Even though eco-paints emit minimal toxins, it’s wise to keep windows open during application for better airflow. 3.Choose Durable Formulas:Some brands offer durable options designed to withstand wear-and-tear—ideal for high-traffic areas like hallways or kitchens. 4.Recycle Leftovers Responsibly:Dispose of any unused paint according to local recycling guidelines to minimize environmental impact.

Mid-Adult Man Painting The Walls In His Apartment Mid-adult male painter painting the walls in a white color. House Painting stock pictures, royalty-free photos & images

Popular Brands Offering Eco-Friendly Paint Options

Brand Notable Features Availability
Benjamin Moore Natura Zero VOCs; excellent durability Widely available in North America
ECOS Paints Non-toxic; customizable colors Available online
Sherwin-Williams Harmony Antimicrobial properties; low odor Nationwide retailers

Switching to eco-friendly paint is one simple yet effective way to create a healthier living space while prioritizing sustainability at home. Choosing these products not only benefits you but also contributes positively toward environmental conservation efforts globally.

Choosing an Eco-Friendly Painting Company Perrysburg OH for Your Home and the Environment

Choosing eco-friendly paint is more than a trend — it’s a meaningful decision for your health, your home, and the planet. With growing awareness of the environmental and health impacts of traditional paints, eco-friendly alternatives have emerged as a superior choice for sustainable living. Here’s why making the switch matters.

Benefits of Eco-Friendly Paint

  1. Healthier indoor environments are particularly important for children, elderly individuals, and those with allergies or asthma.
  2. Many traditional paints contribute to ground-level ozone formation and air pollution during their production and use.
  3. Eco-friendly paints use natural ingredients such as clay, lime, or plant-based materials that are biodegradable and less harmful to ecosystems.
  4. Their reduced environmental footprint makes them a responsible choice for environmentally-conscious homeowners.
  5. Low-VOC and zero-VOC products emit minimal odor during application, improving comfort while painting.
  6. This is especially advantageous in homes where occupants need to remain in the space during renovations.
  7. Advances in paint technology mean eco-friendly options often last as long as conventional paints while maintaining vibrant finishes over time.

Common Ingredients in Eco-Friendly Paints

Ingredient Purpose Environmental Benefit
Water Solvent Replaces petroleum-based solvents; reduces VOC content
Natural pigments Coloring Derived from minerals or plants; less toxic than synthetic dyes
Plant oils (e.g., linseed) Binding agent Renewable resource; biodegradable

How to Identify Eco-Friendly Paints

  • Green Seal: Ensures low-VOC content and environmentally safe practices during manufacturing.
  • LEED Certification Compliance: Recognized standards for sustainable building materials.
  • GREENGUARD Certification: Verifies minimal chemical emissions into indoor air.
  • Terms such as “low-VOC” or “zero-VOC” on product labels also point toward safer choices.

Practical Tips When Using Eco-Friendly Paint

  • Ventilate your space by opening windows during painting projects to further enhance air quality.
  • Conduct proper surface preparation (cleaning walls thoroughly) to ensure optimal adhesion without needing excess coats.
  • Choose light-reflective colors whenever possible; they reduce energy consumption by enhancing natural lighting indoors.

Incorporating eco-friendly paint into your next project not only benefits your home but also contributes positively to global sustainability efforts by reducing emissions and waste associated with traditional materials—choices that matter today more than ever before.

Tips for Choosing the Best Interior & Exterior Painting Perrysburg OH Services for Your Home

Selecting the right type of paint for your interior walls is a critical step in ensuring your painting project meets both functional and aesthetic goals. With a wide range of options available, it’s important to understand how different types of paint can impact the final result in terms of durability, finish, and overall feel.

Types of Interior Paints and Their Applications

  1. Best For:Ceilings, low-traffic areas like bedrooms or dining rooms.
  2. Features:Offers a smooth, non-reflective finish that hides imperfections well. However, it is less durable and prone to stains compared to other finishes.
  3. Best For:Living rooms or hallways with moderate traffic.
  4. Features:Slightly more durable than matte finishes, eggshell paint has a soft sheen that adds subtle elegance while being easier to clean.
  5. Best For:Kitchens, bathrooms, children’s rooms, or other high-moisture areas.
  6. Features:Satin paints strike a balance between aesthetics and practicality by offering a smooth finish that is moderately resistant to dirt and moisture.
  7. Best For:Trim work, cabinets, doors, or areas prone to frequent cleaning like laundry rooms.
  8. Features:Semi-gloss provides a noticeable shine along with excellent durability and washability.
  9. Best For:Small accents such as furniture or decorative pieces rather than large wall surfaces due to its reflective nature.
  10. Features:Creates an enamel-like sheen but requires thorough surface preparation as it highlights imperfections.
Type Sheen Level Durability Best Uses
Flat/Matte No sheen Low Ceilings, low-traffic spaces
Eggshell Low sheen Moderate Living rooms, hallways
Satin Soft luster Good Kitchens, bathrooms
Semi-Gloss Medium shine High Trim work, high-traffic areas
Glossy High shine Very high Furniture accents

Factors Influencing Your Choice

  • Room Functionality: Spaces experiencing more wear (e. g. , kitchens) benefit from durable options like satin or semi-gloss.
  • Wall Condition: Flat paints hide flaws better than glossy finishes.
  • Cleaning Requirements: Opt for semi-gloss or satin finishes in areas where easy cleaning is necessary.
  • Lighting Conditions: Glossier paints reflect more light and can make small spaces appear larger but may cause glare in overly bright spaces.

worker is painting a wall construction worker is painting a wall with a roller House Painting stock pictures, royalty-free photos & images

Tips for Selecting the Right Paint

  1. Always test samples on your walls under varying lighting conditions before purchasing large quantities.
  2. Look for paints labeled as “washable” if you anticipate regular cleaning needs.
  3. Check for low-VOC (volatile organic compound) labels when prioritizing air quality in family spaces.
  4. Match paint finishes based on adjacent surfaces – e. g. , use semi-gloss for trims alongside satin on walls for contrast without inconsistency.

Taking the time to understand these considerations will ensure not only aesthetic harmony within your home but also long-term satisfaction with your painted surfaces over time.

A Guide to Choosing High-Quality Painting Supplies for Professional Results

When it comes to achieving professional results in any interior painting project, the quality of your supplies plays a critical role. Investing in high-quality painting materials can make all the difference between a flawless finish and a frustrating, subpar job. Below is a comprehensive guide to help you select the best tools and products for your next painting endeavor.

Essential High-Quality Painting Supplies

  1. Opt for paints from reputable brands with proven durability and coverage.
  2. Look for “low-VOC” or “zero-VOC” options for better indoor air quality.
  3. Choose paints designed specifically for your surface type (e. g. , walls, ceilings, or trim).
  4. Invest in brushes with synthetic bristles for water-based paints or natural bristles for oil-based paints.
  5. Select an angled sash brush for precision work around edges and corners.
  6. For larger surface areas, use flat brushes to ensure even application.
  7. Choose rollers with varying nap lengths depending on your surface texture:
    • ¼-inch nap: Smooth surfaces like drywall.
    • ¾-inch nap: Semi-rough surfaces like lightly textured walls.
    • 1-inch or more: Rough surfaces such as brick or concrete.
  8. High-density foam rollers are ideal for smooth finishes on cabinets or furniture.
  9. Use high-quality painter’s tape to protect moldings, baseboards, and edges from accidental paint smudges.
  10. Select tape designed specifically to prevent bleeding while ensuring easy removal without residue.
  11. Canvas drop cloths provide superior protection compared to plastic sheets as they are reusable, durable, and slip-resistant.
  12. For light-duty projects, disposable plastic sheeting can act as an economical alternative.
  13. A heavy-duty metal or plastic tray ensures stability during rolling applications.
  14. Use disposable tray liners to simplify cleanup.

Additional Tools Worth Investing In

  • Extension Poles:Useful when painting high ceilings or hard-to-reach areas without requiring ladders.
  • Paint Edgers:Help achieve crisp, clean lines near ceilings or window frames without tape.
  • Sandpaper/Sponges:Essential for prepping uneven surfaces before applying primer or paint.
  • Stir Sticks:Ensure uniform consistency of paint prior to application.
Item Purpose Recommended Material/Type
Paint Brushes Precision work & edge detailing Synthetic bristles (latex)
Rollers Large surface coverage Foam roller (smooth finishes)
Painter’s Tape Protect edges & create clean lines Bleed-resistant
Drop Cloth Floor & furniture protection Canvas
Paint Tray Holds paint during application Heavy-duty w/ disposable liners

Benefits of Using Quality Supplies

  • Improved durability resulting in fewer repaints over time.
  • Enhanced coverage helps reduce the number of coats required.
  • Better control over application leads to smoother finishes with minimal streaks or marks.
  • High-quality tools often last longer than cheap alternatives when properly maintained.

Tips When Purchasing Painting Supplies

  1. Synthetic brushes pair well with latex paints because they resist water absorption better than natural bristles.
  2. Don’t compromise on drop cloths; lightweight plastic sheets may tear easily during work sessions.
  3. Test out samples of tape on small areas before extensive use—this ensures compatibility with different wall textures.

By prioritizing top-notch materials tailored specifically for your project’s needs, you’ll save time, reduce effort spent on corrections later, and enjoy superior results that speak volumes about the craftsmanship behind your work.

Understanding the Role of Paint Primers and When to Use Them

Paint primers are an often-overlooked, yet highly essential part of any painting project. They serve as the foundation for a durable and visually appealing paint finish. Without proper priming, even the highest quality paints can fail to adhere correctly or provide desirable results. Below, we’ll delve into what primers are, why they are important, and when you should use them.

What is Paint Primer?

A paint primer is a preparatory coating applied to surfaces before painting. Its primary purpose is to ensure better adhesion of paint, enhance durability, and provide a uniform base for topcoats. Think of it as the middle ground between the surface you’re painting and the final layers of paint.

Benefits of Using Paint Primers

Using a primer can significantly improve your painting project’s outcome by addressing common issues that arise during application or over time.

  • Improved Adhesion: Primers create a bond between the paint and surface, helping the topcoat stick better.
  • Surface Sealing: They seal porous materials like drywall or wood, preventing uneven absorption of paint.
  • Stain Blocking: Primers cover stains (e. g. , from smoke, water damage, or grease) so they don’t bleed through new layers of paint.
  • Color Uniformity: By creating a neutral base, primers allow true color representation and reduce the number of finishing coats needed.
  • Increased Durability: A well-primed surface resists chipping, peeling, and fading over time.

Types of Paint Primers

Primer Type Best For Characteristics
Latex-Based Primer Drywall or previously painted surfaces Water-based; low odor; fast drying
Oil-Based Primer Woodwork & stained surfaces Durable; blocks tough stains; longer drying time
Shellac-Based Primer Severe stain blocking Excellent for heavy stains or odors
Bonding Primer Glossy/non-porous surfaces (e.g., tiles) Ensures adhesion on difficult-to-paint materials

When Should You Use Primer?

  1. Applied directly to raw drywall, wood, metal, or concrete helps seal pores for smoother application.
  2. Transitioning from darker shades to lighter hues often requires primer for even coverage without unnecessary layers.
  3. Painting glossy surfaces such as tiles requires bonding primers to ensure adherence.
  4. To mask blemishes like watermarks or smoke stains that may show through regular paint layers.
  5. In bathrooms and kitchens prone to humidity exposure, moisture-resistant primers protect against peeling or mildew growth.

House painters beginning to paint a large blue wall House painters beginning to paint a large blue wall. Professional house painters in bright room. House Painting stock pictures, royalty-free photos & images

Tips for Proper Application

  • Always clean and dry surfaces thoroughly before applying primer.
  • Use brushes designed specifically for oil-based primer if working with an oil-based product.
  • Allow adequate drying time between primer coats (typically 1–4 hours depending on type).
  • Sand lightly after priming if necessary to create an ultra-smooth base.

By understanding how primers work and selecting one suited to your project’s needs, you set yourself up for long-lasting professional-grade results in your interior painting endeavors. Proper preparation makes all the difference in achieving beautiful spaces you’ll enjoy for years ahead.

Everything You Should Know About Selecting the Right Paint Finish for Your Space

Choosing the right paint finish is a vital aspect of any painting project. The finish you select impacts not only the appearance of your walls but also their durability and ability to withstand wear and tear. Below, we provide a comprehensive guide to help you make an informed decision about paint finishes for your space.

Common Types of Paint Finishes

Paint finishes are typically categorized into five main types.

  1. Appearance: Non-reflective, smooth, and velvety.
  2. Best For: Low-traffic areas like bedrooms or ceilings where durability isn’t a top priority.
  3. Advantages: Excellent at hiding wall imperfections (e. g. , cracks or dents).
  4. Disadvantage: Difficult to clean; not suitable for spaces prone to stains or moisture.
  5. Appearance: Slightly more lustrous than flat finish with a soft sheen.
  6. Best For: Living rooms, dining areas, and hallways that see moderate traffic.
  7. Advantages: Easier to clean than flat finishes while still hiding minor flaws on surfaces.
  8. Appearance: Smooth with a subtle sheen that reflects more light than eggshell.
  9. Best For: High-traffic areas like kitchens, bathrooms, and kids’ rooms due to its durability.
  10. Advantages: Resistant to moisture and stains; easy to wipe clean without damage.
  11. Appearance: Noticeably reflective and shiny compared to satin or eggshell finishes.
  12. Best For: Trim work, baseboards, doors, cabinets; also effective in bathrooms and kitchens due to its water resistance.
  13. Advantages: Extremely durable and resistant to moisture, making it ideal for high-maintenance surfaces.
  14. Appearance: The shiniest of all finishes with a mirror-like quality.
  15. Best For: Furniture pieces or decorative elements such as moldings; less common on walls.
  16. Advantages: Highly durable; easy to clean but highlights surface imperfections.

Factors To Consider When Choosing a Paint Finish

  1. Functionality & Traffic Levels | Area | Suggested Finish | |—————–|———————| | Bedroom | Flat or Eggshell | | Kitchen | Satin or Semi-Gloss | | Bathroom | Satin | | Hallways | Eggshell or Satin |
  2. Surface ImperfectionsIf your walls have minor imperfections (e. g. , dents), opt for matte or eggshell finishes as they minimize visibility.
  3. Desired AppearanceGlossy paints tend to brighten spaces by reflecting light but may look unappealing in large wall surfaces unless strategically used.
  4. Maintenance Requirements Higher gloss levels deliver better stain resistance & easier cleaning capacity

Everything You Should Know About Selecting the Right Paint Finish for Your Space

Selecting the right paint finish is a crucial step in your painting project. The finish you choose affects not only the overall aesthetic of your space but also the durability and maintenance of the painted surface. Understanding the different types of paint finishes and their ideal applications can help you make an informed decision.

Types of Paint Finishes

Finish Type Characteristics Best Uses
Flat/Matte Non-reflective, smooth appearance, hides imperfections Ceilings, low-traffic areas like bedrooms
Eggshell Slightly reflective, soft sheen, better durability than flat Living rooms, dining rooms
Satin Subtle shine, durable and easy to clean Kitchens, bathrooms, high-traffic areas
Semi-gloss Noticeable shine, highly durable and moisture-resistant Trim, molding, doors
High-gloss Very shiny finish with a polished look Cabinets, furniture

Factors to Consider When Choosing a Paint Finish

1.Room Functionality

  • High-traffic areas (e. g. , hallways or kitchens) benefit from durable finishes like satin or semi-gloss.
  • Low-traffic spaces such as bedrooms or formal living rooms work well with matte or eggshell finishes.

2.Lighting Conditions

  • Rooms with limited natural light can benefit from glossier finishes to reflect light and brighten the space.
  • For spaces with excess natural light, flatter finishes like eggshell or matte reduce unwanted glare.

3.Surface Imperfections

  • Flat/matte paints are excellent for concealing surface flaws like dents or uneven textures since they absorb light rather than reflect it.

4.Ease of Cleaning

  • Glossy finishes (semi-gloss and high-gloss) are easier to clean due to their smooth texture but tend to highlight imperfections in walls or surfaces.

Tips for Selecting the Perfect Finish

To ensure a polished final result:
– Test small samples of different finishes on your walls under various lighting conditions before committing. This allows you to evaluate how they appear at different times of day. – Use satin or semi-gloss paint in rooms where durability is critical due to exposure to grease or moisture (e. g. , bathrooms).
– Combine multiple finishes in one room for contrast—matte walls paired with semi-gloss trim create visual interest.

Visualizing Different Paint Finishes

The choice between paint finishes significantly impacts how color appears on surfaces:
– Matte/flat paints create a soft and muted look that feels cozy and understated. – Glossy paints enhance vibrancy but can make bold colors feel intense.

Selecting the right finish involves balancing aesthetics and practicality while considering your room’s specific needs and design elements.

Interior and Exterior Paint: A Guide from a Trusted Painting Company Perrysburg OH

When choosing paint for your project, understanding the differences between interior and exterior paints is essential. While both serve to beautify surfaces, they are formulated differently to meet specific functional needs. Let’s delve into their key differences, applications, and what makes them suitable for their respective environments.

Composition and Durability

Feature Interior Paint Exterior Paint
Binders Less resilient to moisture; designed for indoor use Highly durable; withstands weather changes
Additives Low levels of volatile organic compounds (VOCs) for safe indoor air quality Includes mildewcides and UV blockers
Resin Type Rigid resins for smooth finish on walls Flexible resins to expand with temperature variations

Interior paints prioritize aesthetics and ease of cleaning, while exterior paints are made to endure harsh environmental conditions like rain, snow, heat, or dirt.

Interior Paint: Characteristics and Common Applications

  • Low VOC Content: Ensures safer air quality in enclosed spaces.
  • Washability: Designed for spaces prone to stains like kitchens or playrooms.
  • Finish Variety: Available in flat, eggshell, satin, semi-gloss, and gloss finishes.
Common Applications:
  1. Living rooms
  2. Bedrooms
  3. Kitchens
  4. Bathrooms (with moisture-tolerant formulations)

Exterior Paint: Characteristics and Common Applications

  • Weather Resistance: Protects against rain, UV rays, wind damage, and mildew.
  • Flexible Resins: Prevents cracking or peeling caused by temperature shifts.
  • Fade Resistance: Retains color vibrancy over time under sunlight exposure.
Common Applications:
  1. Home exteriors (walls and trims)
  2. Outdoor furniture
  3. Garage doors
  4. Fences

Comparing Aesthetic Qualities

While interior paints offer more customizable options in terms of texture and sheen levels for a refined look indoors, exterior paints often emphasize durability over decorative qualities.

Aesthetic Considerations Interior Paint Exterior Paint
Finish Options Wide range – matte to high gloss Limited – typically low sheen
Color Retention Less critical due to controlled light exposure Highly fade-resistant

Choosing the Right Paint

  1. Use interior paints exclusively indoors where durability against weather isn’t necessary.
  2. Opt for exterior paints when working on outdoor surfaces exposed to natural elements.
  3. For transitional spaces like sunrooms or covered patios, consult experts for tailored solutions.

Understanding these distinctions ensures you achieve both functionality and visual appeal in your painting projects while extending the life of your finished surface.

Key Characteristics and Benefits of House Painting Perrysburg OH for Your Space

Interior painting is a crucial element in enhancing the aesthetic appeal, functionality, and personal expression within a space. Understanding its key traits and associated benefits can help you make informed decisions when choosing paints for your home or commercial property.

Key Features of Interior & Exterior Painting Perrysburg OH

  • Low VOC Content: Designed to emit minimal volatile organic compounds (VOCs), making it safer for indoor air quality.
  • Smooth Finish: Provides an even texture that hides minor surface imperfections like cracks or dents.
  • Washability: Many interior paints offer washable surfaces, making them ideal for high-traffic areas prone to dirt and stains.
  • Wide Variety of Sheens: Available in multiple finishes such as matte, eggshell, satin, semi-gloss, and high gloss to match different design preferences.

Benefits of Interior Painting

Investing in high-quality interior paint offers numerous advantages beyond just aesthetic improvements.

1. Enhances Aesthetic Appeal

  • Brightens up dull spaces with a fresh coat of paint.
  • Offers endless design possibilities through various colors and textures.
  • Helps set a mood or theme within specific rooms (e.g., warm tones for living areas or soothing hues for bedrooms).

2. Protects Walls and Surfaces

Interior paint acts as an added layer between your walls and external influences like moisture, grime, or wear-and-tear from daily activities.

3. Improves Indoor Air Quality

Modern interior paints are often designed with low-VOC or zero-VOC technology, reducing the impact on air quality while creating a healthier environment indoors.

4. Increases Property Value

A well-maintained interior featuring fresh paint can make your home more visually appealing to potential buyers or tenants.

Choosing Paint Types Based on Room Usage

Room Type Recommended Paint Finish Key Features
Kitchen Satin / Semi-gloss Durable & easy to clean
Bathroom Semi-gloss / High gloss Moisture-resistant & prevents mold growth
Living Room Matte / Eggshell Soft finish suitable for low-contact surfaces
Children’s Rooms Washable Matte / Satin Stain-resistant & easy maintenance
Hallways Satin Durable enough to withstand frequent contact

Tips for Effective Interior Painting

To achieve optimal results from your interior painting project:
1. Test colors using sample swatches before committing to a shade. 2. Prepare surfaces thoroughly by cleaning them and filling in any cracks or holes. 3. Use painter’s tape to protect edges and achieve clean lines. 4. Invest in quality brushes/rollers suitable for the chosen type of paint. 5. Opt for multiple thin coats rather than one thick coat to ensure better coverage.

By understanding these characteristics and benefits, you can transform your interiors into inspiring spaces that combine style with practicality while protecting underlying surfaces effectively over time.

Top Characteristics of Exterior Paint for Long-Lasting Protection by Painters Perrysburg OH

Exterior paint plays a vital role in ensuring the longevity, durability, and aesthetic appeal of your property. Designed specifically to withstand environmental stressors such as sunlight, moisture, and temperature fluctuations, exterior paint is a critical investment for homeowners and building owners. Below is a detailed look at its characteristics and how it benefits your structure.

Key Characteristics of Exterior Paint

  1. Weather Resistance
    Exterior paints are formulated to endure harsh weather conditions. They resist rain, snow, wind, and UV rays from the sun without fading or deteriorating quickly.
  2. Durability
    High-quality exterior paints often come with advanced technology that offers better adhesion to various surfaces, reducing the chances of cracking or peeling over time.
  3. Moisture Protection
    Many exterior paints include waterproofing properties that help prevent water infiltration into walls, reducing risks of mold or structural damage.
  4. Fade Resistance
    With pigments treated to resist fading from UV exposure, exterior paints maintain their vibrancy for years without frequent touch-ups.
  5. Mildew and Mold Resistance
    Many products contain additives that reduce the growth of mildew and mold on painted surfaces.
  6. Texture Compatibility
    Exterior paints can be applied to various surface types such as wood, brick, stucco, metal, and cement without compromising effectiveness.

1. Long-Term Structural Protection

Exterior paint serves as a protective shield against environmental elements that could otherwise degrade your building’s materials over time. This protective layer keeps moisture out while minimizing wear caused by natural elements like wind and dirt.

2. Enhanced Curb Appeal

A fresh coat of exterior paint can dramatically improve the appearance of your home or commercial building. With modern color options available in matte or gloss finishes, your property can reflect both timeless charm and contemporary style.

3. Cost-Effective Maintenance

By preventing issues like wood rot or rust formation on metal surfaces through proper coating application, you can avoid costly repairs in the future. Investing in quality exterior painting services ultimately saves money in maintenance expenses long-term.

4. Energy Efficiency

Some advanced exterior paints come with reflective properties designed to reduce heat absorption during summer months—helping keep indoor spaces cooler while lowering energy costs.

Home makeover Home makeover and renovation: young happy couple painting their new house interiors using paint rollers House Painting stock pictures, royalty-free photos & images

Common Types of Exterior Paint

Type Description Best Used For
Acrylic Latex Paint Water-based; durable; resists cracking & peeling Siding (wood, vinyl), brick
Oil-Based Paint Offers superior adhesion; smooth finish Metal railings/fences; doors
Elastomeric Coatings Highly flexible; excellent waterproofing capabilities Masonry walls; stucco
Alkyd-Based Paint Durable option ideal for high-traffic areas Outdoor furniture; trims

Tips for Maximizing Durability

  • Surface Preparation: Clean surfaces thoroughly before applying paint to ensure proper adhesion.
  • Use Primer: Applying an appropriate primer creates a smoother surface while enhancing paint durability.
  • Follow Manufacturer Guidelines: Always adhere to drying times and application instructions specific to the product you’re using.
  • Choose Weather-Compatible Products: Consider climate-specific formulations (e.g., rain-resistant coatings for humid regions or UV-protective finishes for sunny areas).

Investing time in selecting high-quality exterior paint not only enhances aesthetics but also protects one’s property against environmental challenges effectively over several years.

Characteristics and Benefits of Exterior Paint for Long-Lasting Protection

When it comes to exterior painting, selecting the right paint type is critical for ensuring durability and protection against environmental elements. Exterior paint is specifically formulated to withstand varying weather conditions, resist damage from UV rays, and defend surfaces against moisture, dirt, and mildew. Below, we’ll explore the key characteristics that set exterior paint apart and its numerous benefits for long-lasting protection.

Key Characteristics of Exterior Paint

  1. Exterior paints are designed to endure harsh environmental factors such as rain, snow, heat, and fluctuating temperatures. The protective layer formed by these paints helps prevent cracking or peeling over time.
  2. High-quality exterior paints are equipped with UV-resistant properties to reduce the impact of sunlight exposure. This helps maintain the vibrancy of colors and prevents fading.
  3. Many exterior paints include water-repellent technology that protects surfaces from moisture penetration, reducing the risk of mold or rot on wooden structures.
  4. Superior adhesion ensures long-term durability on rough or porous surfaces such as stucco, brick, stone, or wood.
  5. Exterior paints often come in finishes like satin or semi-gloss that deliver added resistance to stains and dirt while enhancing visual appeal.

Benefits of Using Exterior Paint

  • Protection Against Environmental Damage:
    Coating exteriors with high-quality paint provides a barrier that protects building materials from weather-induced wear-and-tear over time.
  • Enhanced Curb Appeal:
    A fresh coat of exterior paint can increase your home’s value by creating an attractive appearance that leaves a lasting impression on visitors or potential buyers.
  • Energy Efficiency:
    Certain modern exterior paints are engineered with reflective pigments that help regulate indoor temperatures by reflecting sunlight away from your property.
  • Cost-Efficiency Over Time:
    Investing in durable exterior paint reduces maintenance costs over several years since it minimizes issues like peeling or the need for frequent touch-ups.

Choosing the Right Type of Exterior Paint

Paint Type Key Features Ideal Surfaces
Acrylic Latex Flexible coating resistant to cracking Wood siding, stucco
Oil-Based Durable finish suitable for high-impact areas Metal surfaces
Elastomeric Highly stretchable; seals cracks effectively Masonry walls
Enamel Provides glossy finishes enhanced with toughness Doors and trims

Tips for Maximizing Longevity with Exterior Painting

  1. Always clean surfaces thoroughly before applying any coating to ensure proper adhesion.
  2. Use primers specifically designed for your surface type (e.g., masonry primer for brick walls).
  3. Avoid painting during extreme weather conditions—optimum results are achieved between 50°F–85°F (10°C–29°C) with low humidity.
  4. Consider investing in professional-grade tools such as sprayers or rollers designed for smooth application across large areas.

By understanding the essential characteristics and advantages associated with exterior paint types—and implementing best practices during application—you can significantly enhance both the function and aesthetics of your property while ensuring its longevity against external challenges over time.

Surface Preparation and Priming Techniques for a Professional Finish

Proper surface preparation and priming are the cornerstones of achieving a professional, long-lasting paint finish. Whether tackling an interior or exterior painting project, neglecting this critical step can lead to issues such as peeling, uneven coverage, or poor adhesion. Below is an in-depth look at techniques and practices to ensure your paintwork stands the test of time.

Importance of Surface Preparation

  • Improves Adhesion: Well-prepared surfaces allow primer and paint to bond effectively for a durable finish.
  • Ensures Uniform Application: Smooth surfaces create even paint distribution, minimizing streaks or patchiness.
  • Prevents Common Paint Failures: Properly prepared surfaces reduce risks such as bubbling, cracking, or flaking over time.

Man painting wall with a roller in home renovation project Man painting wall with a roller in home renovation project House Painting stock pictures, royalty-free photos & images

Steps in Surface Preparation

  1. Remove dirt, grease, mold, or any residue using appropriate cleaning solutions.
  2. For interior spaces: Use mild soap and water for walls; degreasers may be required for kitchen areas.
  3. For exterior areas: Pressure washing is effective in removing stubborn grime and mildew.
  4. Patch holes or cracks with spackling paste (for interiors) or exterior fillers.
  5. Sand rough patches smooth once dry to create an even surface.
  6. Sand glossy surfaces to improve primer adhesion.
  7. Use fine-grit sandpaper for delicate surfaces and coarse-grit sandpaper for tougher areas.
  8. Scrape away chipped or flaking paint using a putty knife or scraper.
  9. Sand edges around removed paint to feather them smoothly into surrounding areas.
  10. Spot-treat stubborn stains like rust or watermarks with sealers designed specifically for stain blocking.

The Role of Priming in Achieving Perfection

  • Seals Porous Surfaces: Materials like drywall absorb paint unevenly without primer.
  • Improves Coverage: Primer helps achieve consistent color by masking imperfections on the base surface.
  • Enhances Durability: A quality primer reinforces adhesion while protecting against premature wear.

Types of Primers

Primer Type Best For Key Benefits
Oil-Based Primer Woodwork & stained surfaces Superior stain-blocking properties
Latex-Based Primer Drywall & previously painted areas Low VOC; quick-drying
Shellac Primer Smoke damage & strong stains Excellent odor-blocker

Best Practices for Applying Primer

  • Choose a primer suited to your specific surface (e.g., wood vs metal).
  • Apply thin coats evenly using brushes on edges and rollers on larger areas.
  • Allow sufficient drying time before applying topcoats (as recommended by product instructions).

Common Mistakes to Avoid

  1. Skipping cleaning steps before applying primer—this leads to poor adhesion.
  2. Using incompatible primers—for example, oil-based primers may not work well with latex paints unless specified.
  3. Applying too much primer at once—this can cause dripping and extended drying times.

Taking time upfront to prepare your surfaces properly ensures that every layer applied afterward performs optimally while enhancing aesthetics and durability alike. The combination of methodical preparation techniques paired with quality primers will elevate any painting project from mundane to extraordinary results worthy of professional standards.

Application Methods and Techniques to Achieve Perfect Paint Results

Achieving a flawless paint finish requires not only selecting the right materials but also employing proper application methods and techniques. Whether you’re a seasoned professional or a DIY enthusiast, understanding the best practices can make the difference between a satisfactory outcome and an exceptional one. Below is a detailed guide on achieving perfect paint results.

Essential Tools for Paint Application

Brushes:
Natural-bristle brushes: Ideal for oil-based paints or varnishes.
Synthetic-bristle brushes: Best for water-based paints as they maintain their shape when wet.

Rollers:
Short-nap rollers (1/4″ to 3/8″): Suitable for smooth surfaces like drywall or wood.
Medium-nap rollers (1/2″ to 3/4″): Effective on semi-rough surfaces such as textured walls.
Long-nap rollers (over 3/4″): Ideal for rough surfaces like stucco or brick.

Other Tools:
– Paint trays and liners
– Drop cloths to protect floors and furniture
– Painter’s tape for clean edges
– Extension poles for reaching high areas
– Sandpaper or sanding blocks

Proper Application Techniques

  1. Use an angled brush to “cut in” around edges such as corners, ceilings, baseboards, and trim.
  2. Maintain steady strokes and aim to blend the edges into larger painted areas seamlessly.
  3. Load your roller evenly by rolling it back and forth in the tray.
  4. Apply paint in “W” or “M” patterns to distribute it uniformly before filling in gaps with horizontal strokes.
  5. Avoid overloading the roller; this reduces drips and splatters.
  6. For optimal coverage, apply multiple thin coats rather than one thick coat.
  7. Allow sufficient drying time between coats as recommended by the paint manufacturer.
  8. When blending sections, use long overlapping strokes to “feather out” edges so they don’t appear uneven after drying.

Common Application Mistakes to Avoid

Mistake How to Avoid
Skipping surface preparation Clean surfaces thoroughly and patch imperfections beforehand.
Over-dipping brushes Dip only one-third of bristles into paint to avoid dripping.
Painting unevenly Use consistent pressure and movement while applying paint.
Ignoring drying times Follow manufacturer guidelines for proper curing between coats.

Specialty Techniques for Advanced Results

  1. Sponging: Creates a textured look by dabbing contrasting colors with a sponge over a solid base.
  2. Stenciling: Allows you to create intricate patterns using pre-designed templates.
  3. Strié (Dragging): Produces subtle vertical or horizontal stripes by dragging a dry brush through wet glaze.

These techniques require precision but can add depth and uniqueness to any space when executed properly.

By combining high-quality tools with disciplined techniques, you can achieve smooth finishes that enhance both aesthetics and durability in any painted project—whether indoors or outdoors—and ensure lasting satisfaction with your work.